 All guides
All guides
All guides
Everything you need to log in, set up your roster, and open the kiosk for the first time.
Go to the Log in page and sign in with your email and the temporary password emailed to you. On first login, you'll be prompted to set a new permanent password. Either way, you'll land right on your dashboard.
The dashboard is an app that runs right in your browser — no install needed, four tabs across the top. Live roster shows who's checked in right now. History covers today's activity, with a link through to Long-term history for any date range plus CSV/XLSX export and correcting a mistaken check-in or check-out time. Students (manager-only) lists your whole roster with sort, filter, color-coded tags, and birthday badges, plus a + Add / Import button for adding students one at a time or in bulk. Admin (also manager-only) is where you manage Manager/Staff logins, customize how the kiosk finds someone — number-only or a badge scan — and print barcode student ID cards.
Your email in the top-right corner is also a menu — click it for Help, Sign out, and (for Managers) Manage SwiftCheck subscription. Right next to it, a Students / TimeClock toggle (Manager-only) switches the whole dashboard over to staff clock-in/out. See the TimeClock guide for the full walkthrough.
Open the Students tab and click + Add / Import (visible to managers only).
Use the bulk import tool to upload a CSV or XLSX file of your roster. Here's what the format looks like:
| First Name | Middle Name | Last Name | Grade | Notes | Birthday |
|---|---|---|---|---|---|
| Alex | Kim | 5 | 03-14 | ||
| Jordan | Marie | Lee | 3 | ||
| Sam | Patel | 7 | Allergic to peanuts | 11/02 | |
| Taylor | Ann | Chen | Kindergarten | ||
| Morgan | Diaz | 2 | New student - Aug 2026 |
Download sample CSV Download sample XLSX
Middle name, notes, and birthday are all optional — birthday can be month/day (03-14) or a full date (3/14/2015, year discarded). Swap in your own students, then upload the file the same way.
On the same device, click Open Students Kiosk in your dashboard's top-right corner — it opens right in the same window. (Toggled to TimeClock mode? The same button becomes Open TimeClock Kiosk instead.) Setting up a separate front-desk tablet? Sign in there with the kiosk link — the first time, it'll ask Which kiosk is this? once, and that device remembers the answer from then on.
The kiosk is also just an app that runs in your browser — no install needed. Set up any tablet or laptop at your front desk with the kiosk page open. Students type a few letters of their name, tap their name from the results, then tap Check In or Check Out — no PINs or cards needed. Every student also has a unique student number, so they can search by number instead of name if they'd rather.
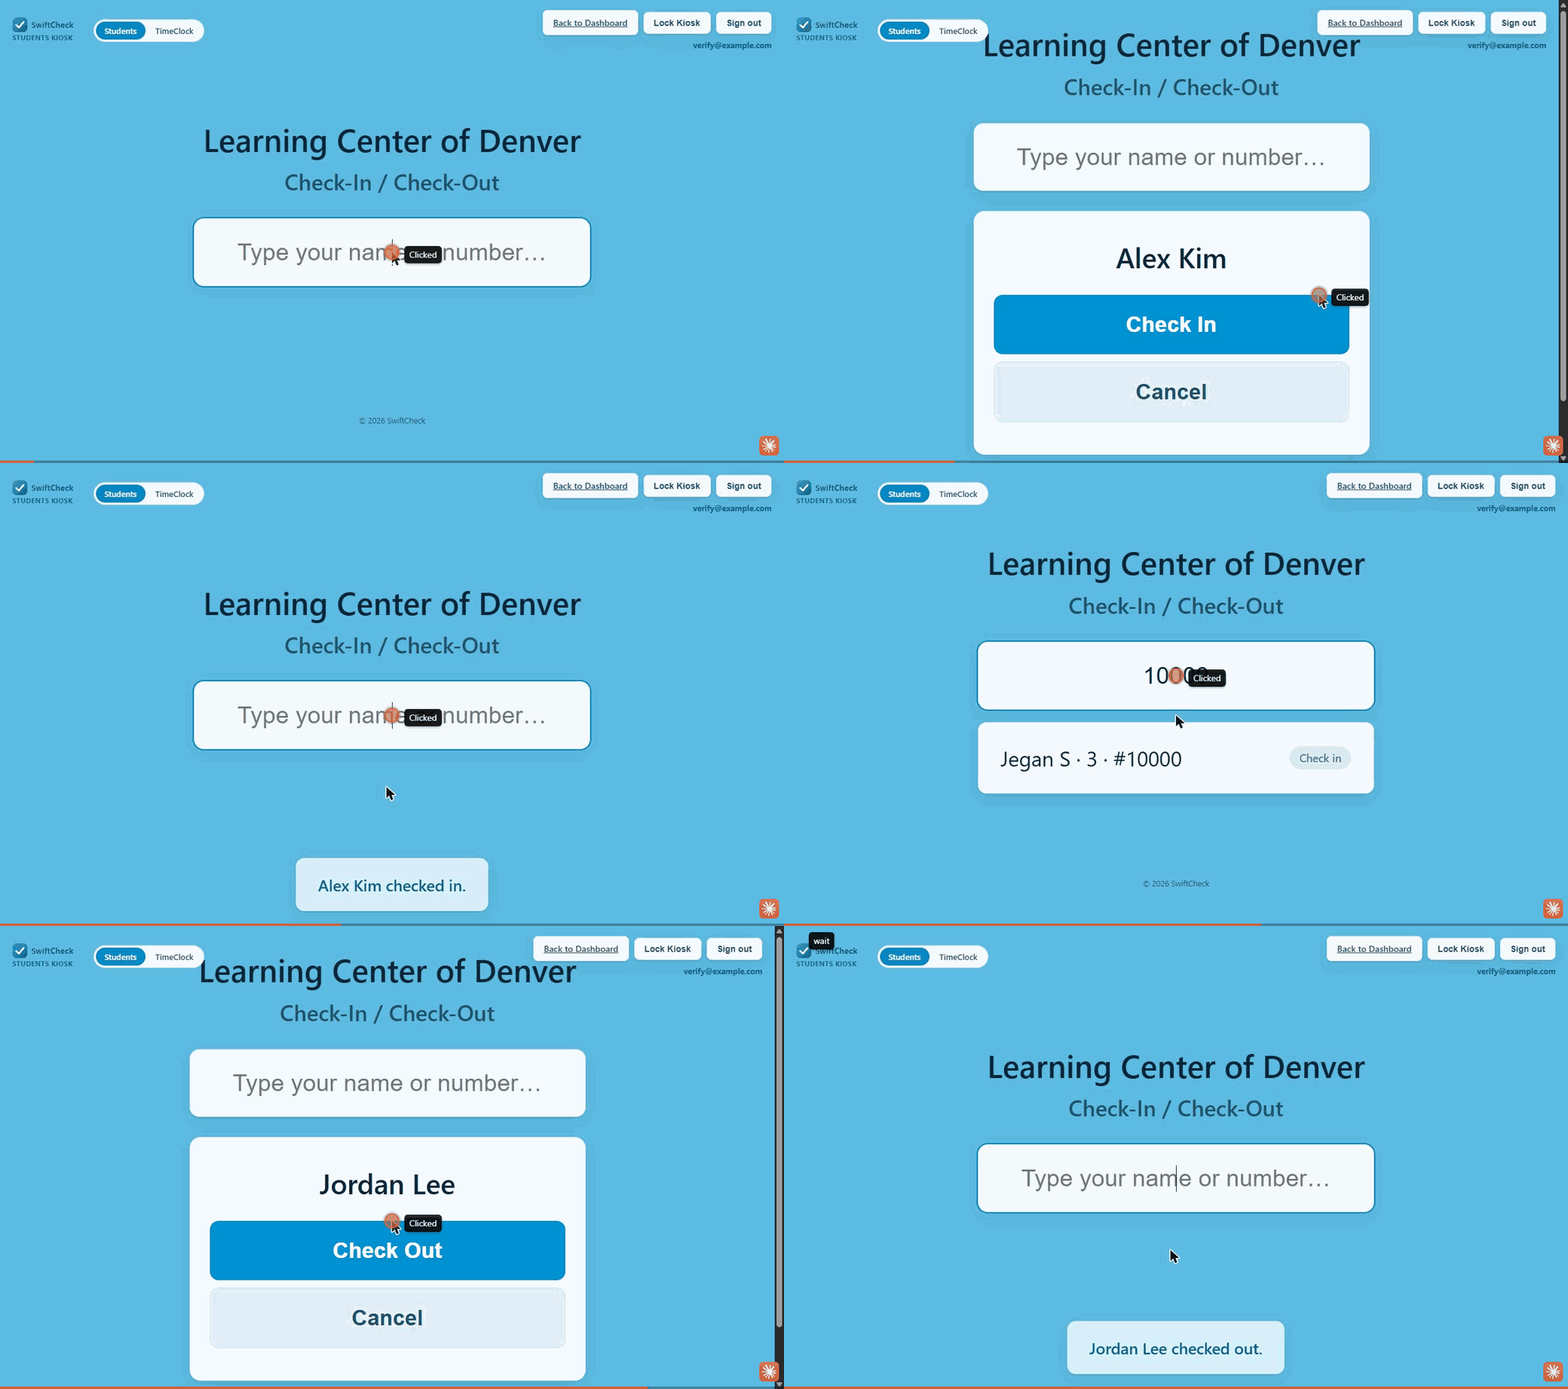
Staff can sign out of the kiosk with the Sign out button and sign back in to continue.
A few more guides for what SwiftCheck can do beyond check-in:
Who's checked in right now, checking students in or out from the dashboard, and spotting who's over their time limit.
See the live roster →Color-coded labels for whatever categories your center needs, each with an optional recommended time limit.
How tags work →Quiet badges and a kiosk celebration, set once with no yearly upkeep.
See how it works →Search any date range and export to CSV or Excel for records or billing.
Learn export →What Staff and Manager accounts can each do, in one clean table.
Compare roles →The three ways the kiosk can find someone — name or number, number only, or a badge scan.
See how it works →