 All guides
All guides
All guides
Tags are simple colored labels you create for whatever matters at your center. This guide covers creating and assigning them, and how the recommended time limit works, so you can start using them today.
Looking for birthday reminders instead? →
A tag is a name, a color, and an optional note — created once and applied to as many students as you like. A small colored dot next to a student's name shows every tag they carry, on the Students tab, Live Roster, and History.
You can create up to 20 tags per center — enough to cover the things that actually matter without turning into a junk drawer.
On the Students tab, click Tags ▾ → + New tag. Give it a name, pick a color, and optionally add a description — for example, a longer allergy note that only shows when you open the tag.
Check the tag when adding or editing a single student, or apply it to a whole group at once: open the tag from Tags ▾ and choose Select students.
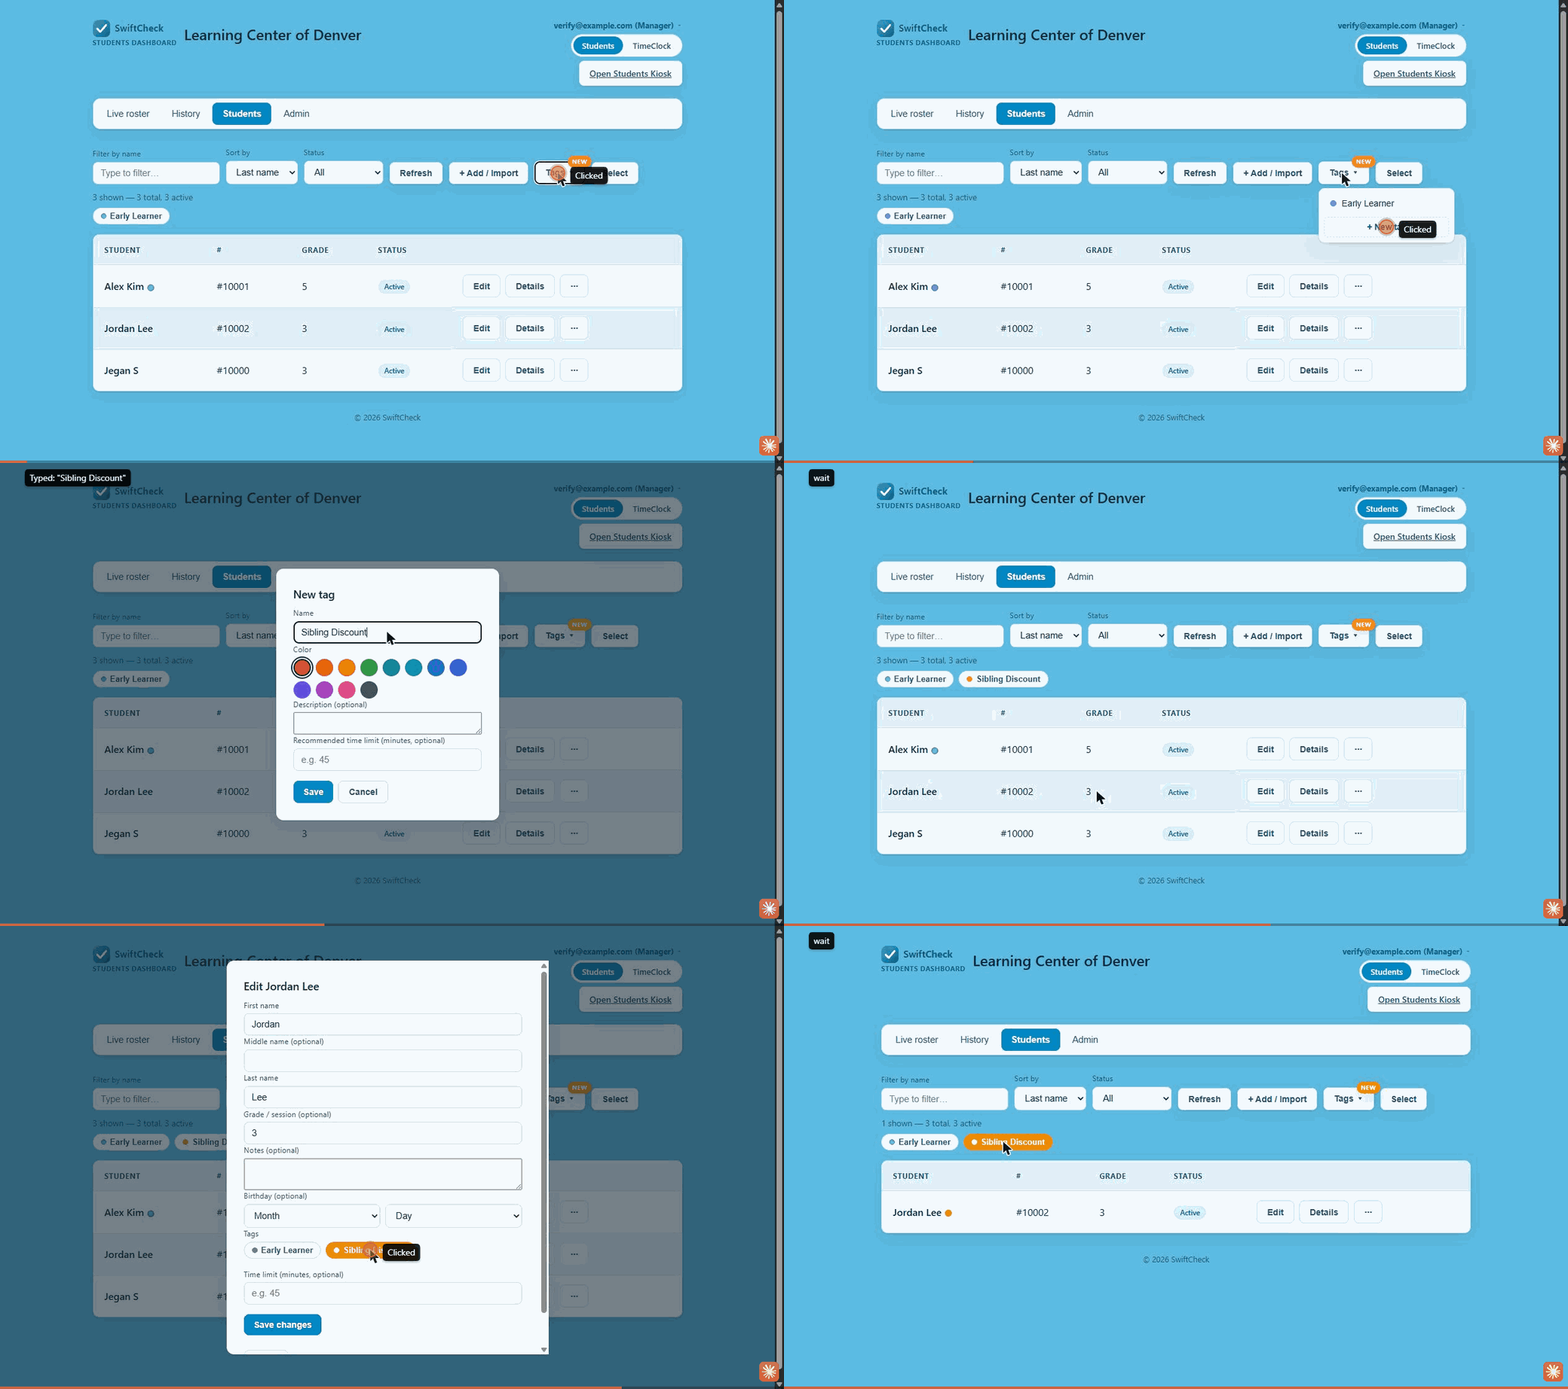
Colored filter chips sit above the Students list and Live Roster. Click one to show only students carrying that tag — click it again to clear.
Select a second tag, and an Any / All switch appears: Any (the default) shows anyone carrying at least one of the selected tags, while All narrows it down to only students who carry every one of them — handy for something like "EL and Sibling Discount" at the same time.
With Early Learner and Sibling Discount both selected, here's what that switch looks like — "Any" is on, so the roster shows anyone with either tag:
Everywhere a student's name appears, their tag dots come with it. Hover any dot to see the tag's name.
Tags don't do anything on their own — they're just labels. What makes them useful is what you decide they mean.
A bright color your front-desk staff can't miss, with the details in the tag's description.
Flag students who need ID checked at pickup, or who are only allowed to leave with specific people.
Group students by program, level, or class time to filter the roster down when you need just that group.
Keep track of sibling discounts or scholarship students for your own records — nothing here touches billing.
Pair a tag with a recommended time limit (below) so every student in that group starts with the same expected session length.
A temporary tag to keep an eye on students in their first few weeks, removed once they're settled in.
Every student can have their own time limit — how long, in minutes, they're expected to stay for a session. A tag can carry a recommended version of that number, so you don't have to type it in one student at a time.
Example: you run a standard 45-minute session. Create a tag called "Standard Session," set its recommended time limit to 45, and apply it to that group of students. Each one's time limit is now 45 minutes — editable individually any time a particular student's schedule is different.
Here's what your staff sees on the Live Roster once someone's stayed past their limit — a quiet flag, not an alarm:
Sam's row gets a soft red tint, and hovering over it shows "Past Time Limit." Nothing happens automatically — it's simply a visual cue for staff.
No. It's entirely optional — plenty of centers use tags without ever touching it.
No. Once a tag fills in a student's time limit, it becomes that student's own setting — removing the tag later doesn't touch it.
No. The recommended limit only gets applied at the moment you tag a student. Editing the tag afterward only affects students you tag from then on.
No — those are both staff-only, visible on the dashboard.
Up to 10 per center.
Any (the default) shows a student if they carry at least one of the tags you've selected. All only shows students who carry every one of them. The switch appears automatically once you've selected a second tag.
Tags and time limits are included at no extra cost, on every SwiftCheck plan.
Go to my dashboard